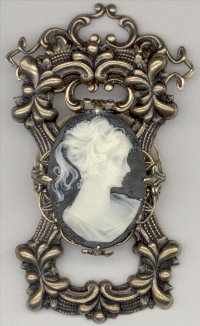
In this focal point piece,
I gathered seemingly unrelated pieces of filigree, stampings and functional findings and then layered them together to create something out of the ordinary.
Tip: Use a dot of E6000 glue between each layer of the pieces to hold everything together. After the project had time to set, I gently pushed the prongs onto the edge of the cameo to give the illusion that they are doing all the work.
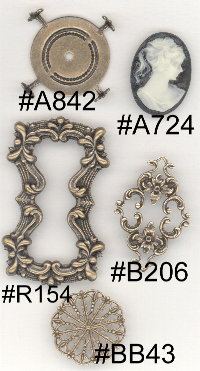
The item numbers are shown below each piece used to make this pendant. Using a filigree piece like #B206 near the top of the pendant allows for necessary openings to attach chain, ribbon or bead strands.
Some elements of this design technique include:
1. Framework – Adds textural interest and defines the focal point.
2. Filigree – Allows for a functional base which gives you connector rings where there are none.
3. Settings – Provide a base for jewelry stones so that you don’t just glue them directly onto the filigree. Settings make your work look so much more professional.
4. Connectors – Have multiple loops and openings within their design which allow for interesting ways to connect one section of your work to another.
5. Chain – Use individual links of chain as bails, jump rings or spacers between beads. Use small sections of chain as connectors between beading.
6. Focal Point – It may be a large polished gemstone, a cameo, an intaglio, a decorative stamping or vintage glass gem replica, but there is usually something which serves as the focal point and inspires you to create the rest of the piece.
Rather than selling kits to teach you how to make one piece of jewelry, we want to teach you techniques to use in any design style you wish. Your imagination is all you need once you learn the basics.
Visit our store web site VintageJewelrySupplies.com to shop for these and thousands more items.
(NOTE: our website best viewed on desktop or tablet)
